There are numerous variants of the recipe for Brandy Snaps, few make any reference to brandy. A glance down the ingredients might indicate that these are high calorie biscuits and so to be avoided. Certainly they can never be considered ‘healthy’ but each biscuit only requires around a teaspoon or so of the paste so perhaps the final calorie count isn’t quite as bad as some might think. I’m not going to get a calculator out to check.
After searching the internet and various books I decided to use a recipe given by Jane Grigson in her book English Food first published in 1974. This is one of a very few recipes I found that does include brandy in the ingredients.
Curious about the history? Read on.
If you read this blog you will know that we like to know a little of the history of the things we bake. The Oxford Companion to Food by Alan Davidson is always a good starting place. From this source we learn that brandy snaps were around at least as far back as 1898 the ‘lack of discriminative taste peculiar to uneducated palates’ made use of brandy redundant, manufacturing the biscuits without brandy was cheaper and if the target market included those with such ‘uneducated palates’ then they wouldn’t know the difference if the key ingredient was missing!
Wikipedia advises that brandy snaps do not include any brandy in the recipe, rather that they can be served together with whipped cream that incorporates a little brandy. From here we do learn that the biscuits date back a little further than the account provided by Alan Davidson. A publication in 1802, Family Friend or Housekeeper’s Instructor, defined brandy-snaps as a small cake of gingerbread, probably brand-schnap from being burnt, to for the real or supposed presence of brandy.
Mrs Beeton makes no reference to these biscuits despite her Book of Household Management being published in 1861 when brandy snaps must have been well established.
One of the key ingredients of any brandy snap is golden syrup. Jane Grigson writes that this product was not available until the 1880s. Earlier versions of the recipe would have used black treacle instead. Golden syrup is a product developed by the British company Tate and Lyle. Abrams Lyle was a Scottish businessman who had his five sons build a sugar refinery in Greenock in 1881. Mr Lyle knew that the refining of sugar cane produced a treacly syrup that was usually wasted. He began marketing the syrup as ‘Goldie’, at first on a small scale but the product quickly found its market and within weeks the firm was selling more than a tonne a month. The Tate and Lyle website states that the still used green and golden tin has hardly changed since its introduction in 1885. Golden Syrup was awarded a royal warrant in 1911 that it has retained ever since. The firm is named in the Guinness Book of Records as the world’s oldest brand.
Despite the popularity of Golden Syrup in the UK, until recently the product wasn’t easy to find in France. Nevertheless the most recent French series of Bake Off required candidates to produce Les Brandy Snaps for the semi-final to the competition. Mercotte, the Mary Berry of the French Bake Off, published the recipe the candidates were required to use on her website. While Golden Syrup is now relatively easy to find in French supermarkets the recipe imposed on the candidates substituted glucose. Of course the programme was seen by plenty of British viewers and comments left on the web-site go to some lengths to criticise the programme for veering so far from the ‘original’ recipe. Despite that, none of those that took time to express their views publicly to Mercotte advised that older ‘original’ recipes used black treacle.
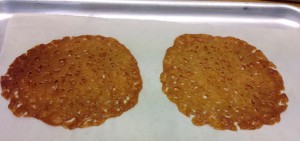
Reading around the subject, it seems that these biscuits were first popularised as a ‘snack’ food at fairs and fetes. Jane Grigson advises they were sold alongside eel pies and gingerbread. In the 1970s when she wrote English Food, brandy snaps were still sold at Marlborough’s annual fair in large flat rounds. Mrs Grigson thought they made a better alternative than candy floss.
Ingredients (20-30 biscuits)
120g butter
120g Golden Syrup
120g granulated sugar
120g plain flour
10g ground ginger
10g brandy
5g lemon juice
pinch of salt
Prepare baking sheets covered with baking parchment. The biscuits can be cooked in batches making it easier to mould them into rolls or baskets. Any moulding needs to be done quickly after the biscuits come out of the oven, as they cool they become crisp and unworkable.
If you want to make cylinders from your biscuits, the traditional way is to shape them around the handle of a wooden spoon. Lengths of stainless steel pipe are another alternative.
For ‘basket’ shape brandy snaps you can use a ramekin or small bowl as the mould. Silicone ‘cups’ sold for poaching eggs are another alternative, as are the silicone moulds sold to make half spheres of chocolate etc.
Pre-heat oven at 160c
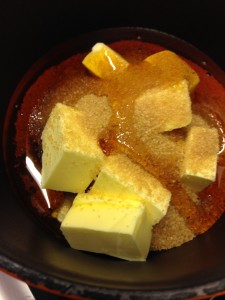
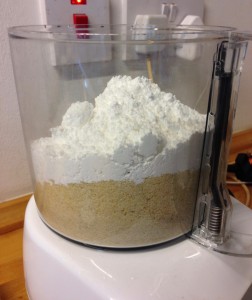
Add butter, syrup and sugar to a heavy based pan, place over a moderate heat and stir until you have a smooth mixture. Make sure the mixture doesn’t become too hot.
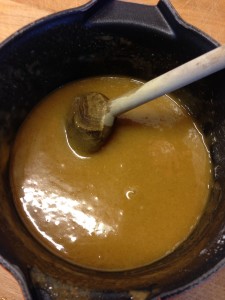
Take the pan off the heat and allow the mixture to cool until it is just tepid.
Still off the heat, stir in flour, ginger, lemon juice, brandy and salt.
Place teaspoons of the mixture onto prepared baking sheets making sure to space them well as they will spread considerably during baking.
Bake at 160c for 8-10 minutes. The time will depend both on your oven and on the amount of mixture you use for each biscuit.
Have any moulding devices to hand immediately the biscuits come out of the oven. You will find that for the first few seconds it is impossible to move the biscuits without damaging them. Quickly though the mixture will begin to cool and you have a small window of time when the biscuits can either be rolled or pressed around whatever moulds you have selected.
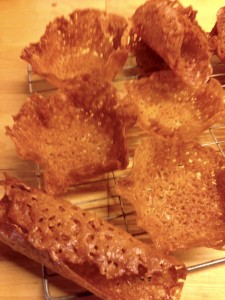
These are straight out of the oven:
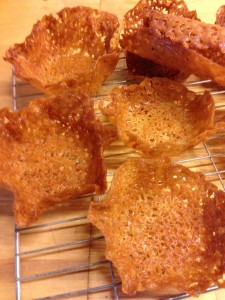
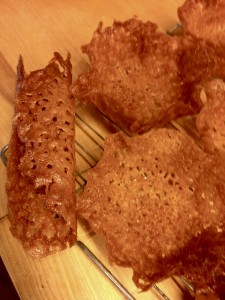
Below are biscuits moulded as baskets and rolls:
Grigson, Jane (1974) English Food. Penguin books, 1979 edition.
Davidson, Alan (1999) The Oxford Companion to Food, Oxford University Press, 2006 edition.
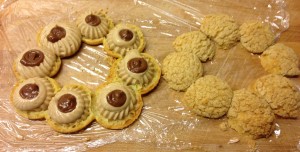
This classic of French patisserie can be found in many boulangeries or patisseries throughout France. It is based on choux pastry, a topic we covered in an earlier post. The recipe for this particular choux based product dates from 1910 when it was developed by Louis Durand of Maisons Lafitte to commemorate a bicycle race between Paris and the town of Brest that had been inaugurated in 1891 and which became the forerunner of the Tour de France.
The original recipe called for a ring of choux pastry garnished with a praline butter cream. The circular form was to represent a bicycle wheel. Initially the cakes were made on a large scale. Portions were available to cyclists ‘a la coupe’ alongside bread, to ensure sufficient energy to continue this challenging 1,200km race (Paris to Brest and back).
More recently the cakes have been sold as individual portions. Traditionally they are sprinkled with flaked almonds as decoration.
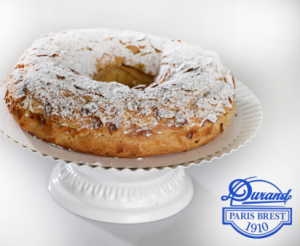
This image comes from a website that gives a full history of the pastry.
More recently the pastry has reached a new popularity thanks to Phillippe Conticini, French pastry chef. The aim was to modernise the look and to lighten the taste of this classic while maintaining its original characteristics: a circle of choux pastry with a praline based filling.
This recipe is based on that of Conticini, additional guidance was found on the website of Mercotte, judge in the French version of Bake Off.
Three stages are necessary for this version of Paris Brest. The finished product can be used as one serving but because it is based on a ring of ‘chouquettes’, it can easily be shared. Amounts given below will be enough for three Paris Brest.
This version of choux pastry differs slightly from the one we provided earlier. The previous version will work just as well, this just offers an alternative.
This version will produce sufficient for 3 Conticini style pastries, each can provide up to 8 small portions.
Pre-heat your oven to 250c
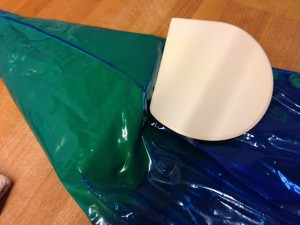
First, prepare your baking sheet. Choux pastry needs to be piped while still warm so it is easiest to do any preparation in advance. It is easier to pipe the paste if you have a template to guide you. The diagram here is a miniaturised version of the template we use.
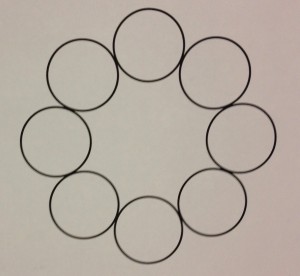
Each circle has a diameter of 35mm. You want each piped circle to touch its neighbours so that they will hold together to form an unbroken ring when baked.
If you don’t get this right first time don’t worry. At worst you will have 8 individual chouquettes that can still be filled and presented in a ring.
Craquelin
Addition of small discs of craquelin to each chouquette helps to ensure a more uniform bake. Simple to produce, a disc of craquelin can be added to any choux based pastry. Make this before you begin the choux paste itself so that it can set in the freezer making it easier to use.
You will need:
50g softened unsalted butter
60g Demerara sugar
60g plain flour
Don’t worry if you don’t get this right first time, it can take a bit of experimentation to get the texture and thickness right. Using butter that is soft but not melted will help enormously to get a craquelin that can be successfully rolled out. Placing the pre-marked sheet in the freezer while you make the choux paste will ensure that the butter has re-set sufficiently to allow the discs to be removed from the rest.
At worst you might find that the discs fall apart while baking. No problem, you will have pieces of crystallised sugar attached to the pastry rather than discs. Sprinkle with a little icing sugar, no-one need know that this wasn’t the intended result! Sometimes a little pragmatism helps, there is so much to learn to create good results but ‘mistakes’ needn’t mean disaster.
Choux Paste.
125g water
60g butter in small cubes
2g salt
2g sugar
80g plain flour
125g eggs beaten as for an omelette (approx 3 medium eggs weighed without shells)
The method is much as we have described previously. If you have mastered that and you don’t want to change just yet, make a batch to that recipe, come back here when your paste is ready to pipe. You will need to double the quantity to have sufficient for two Paris Brest.
The next stage can be done by hand or with a stand mixer (such as Kenwood Chef or Kitchen Aid).
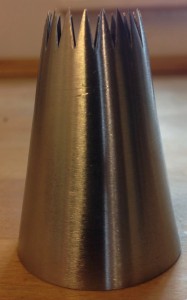
The final result should be a silky, warm paste. Transfer this to a piping bag fitted with a 8mm (or thereabouts) nozzle.
This size nozzle works well but a millimetre either way won’t spoil the result. You can simply snip the end of your pastry bag and pipe direct if you don’t have a nozzle to hand. A plastic food grade bag can substitute for a piping bag if necessary, snip one corner to pipe.
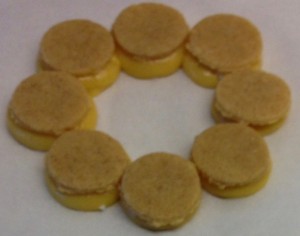
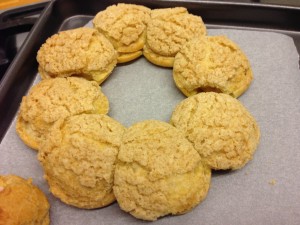
Here you can see choux pastry for one Conticini style Paris Brest capped with craquelin disks.
Of course you can pipe the choux paste exactly as you wish. This was my first attempt at Paris Brest, I piped two circles like the one show above. The rest of the paste was used to make an ‘eclair’, four chouquettes piped so that each touched the next and topped with chraquelin discs; also a few individual chouquettes. In all the paste would have been sufficient for three pastries as shown above.
If you decide not to make the craquelin you could sprinkle some candied sugar over the piped paste before baking.
Your oven should have reached 250c by the time your paste is ready to bake.
Ovens can vary significantly even if models appear similar. If you search the internet you will find advice that choux paste cannot be cooked in a fan oven, in a gas oven or in any other type of oven you can think of.
You will need to experiment to find cooking times and temperatures appropriate to your own device.
We have an electric fan oven with no option to cook in static heat. Despite advice that static heat is vital we have not found it difficult to cook choux paste.
Having placed the baking try into the preheated oven we turn the heat off but leave the fan running. If you don’t have this option don’t worry, you will just need to experiment a little until you find the settings that are right for you. Notes below give some information that might help you to achieve good results.
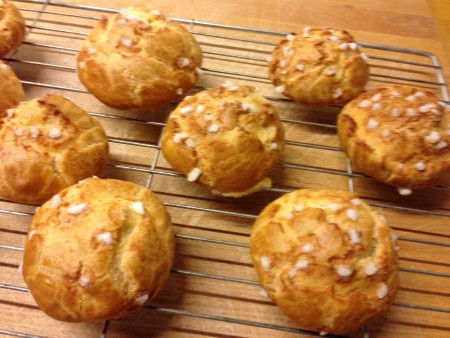
It is important to leave the oven door closed while cooking. Also to allow the pastries to keep cooking until they are risen and browned. Don’t panic if the piped paste looks disastrous at the end of the first 25 minutes. They will puff up nicely during the second part of the cooking process.
The easiest mistake to make is to stop the cooking process too early. Pastries look great when they come out of the oven but, as they cool, they collapse to a sad flat shape. It might seem odd that such small pastries need the best part of an hour to bake but this is certainly the case. Remember that the structure needs a strong exterior as it will be more or less hollow inside. We will write more about the science behind choux pastry in due course.
Here is where this version Paris Brest differs from the original. Traditionally the cakes were filled with a mixture comprising crème pâtissière and creme au beurre. This is a crème mousseline. A classic of French patisserie.
There is nothing wrong with crème mousse line but Phillippe Conticini replaced it with a praline cream, a (slightly) lighter option.
You will need:
2g gelatine soaked in cold water for 15 minutes before use
155g whole mix
2 egg yolks
30g caster sugar
15g corn flour
89g praline paste
70g unsalted butter at room temperature
It really is important to weigh your ingredients. Amazon, amongst others, sells digital scales for less than £10 allowing accurate weighing from .1gramme. The Amazon link will take you to the scales we bought in 2014, still working well with original battery!
Praline paste can be found easily via online retailers including Melbury & Appleton. In the alternative it can be made at home. Pierre Hermé has published a recipe, the link provided is to one of many sources detailing the recipe. We intend to show how to make praline and pistachio pastes in a future post.
The third essential for this and many other recipes is an accurate thermometer. We use a Thermapen, made by Electronic Temperature Instruments Ltd based in West Sussex. We are not affiliated with this company but we have been extremely impressed by their product.
Method
Remember to soak the gelatine in cold water for at least 10 minutes.
Prepare a piping bag with a 10mm nozzle.
We used this but a plain nozzle would be just as good.
A measuring jug sufficient for 800ml would work. Our stick blender was probably the cheapest on the market when purchased some ten years ago, it came with a jug that holds 1l so ideal for tasks like this.
You will need:
100g praline paste
35g double cream
This third element of the recipe gives a more intense praline flavour to the finished Paris Brest but if you don’t have sufficient praline paste the cakes will still be good without an insert.
The insert is simply an emulsion between the praline and the cream. As with most emulsions used in patisserie it is recommended that you whisk the ingredients together in three stages.
Once the choux circles are cool, slice them horizontally and gently lift away the top parts with the craquelin. This is a fragile task but a large sharp knife makes it easier than it might seem.
Pipe a good portion of the praline cream onto each of the eight base discs.
Pipe a small portion of the praline insert to the centre of each disc.
Carefully replace the top ring of discs.
Exactly the same procedure can be used to finish chouquettes individually, or piped together to form an eclair shape.
English is a confusing language even for native speakers. We are criticised for failing to learn other languages.
Even with the best of teachers French can cause as much confusion as English. This entry is headed Choux. Will we be discussing cabbage and its versatility, or pastry, also versatile with numerous uses both sweet and savoury?
Leaving cabbage for later this entry introduces choux pastry with a recipe for ‘chouquettes’, small balls of choux pastry, often sprinkled with candied sugar and found for sale in almost all patisseries in France. Master the art of chouquettes and you have all the necessary knowledge to create a wealth of other choux pastry based products including éclairs, religieux, glands (so called because they are meant to resemble acorns, for which the French word is gland) and the impressive pièces montées central to many wedding banquets.
Curious about the history? Read on….
History
It is likely that you will have come across choux pastry whether you have known it or not. Most English bakery shops sell éclairs. Many restaurants serve profiteroles. French patisseries also sell numerous cakes based on choux pastry including their interpretation on eclairs and other common delights such as the religieuse, the divorce, the gland and of course the ubiquitous chouquette. The gland is usually decorated with green icing because it is supposed to resemble an acorn. Those who concentrated more than me in their French class at school might not have needed to look that up.
The Saint-Honoré is a slightly more elegant pastry than many of those listed above:

Christophe Michelak, one of the better known French Pâtissiers of today, has taken the well known religieuse, two choux buns, one larger than the other, usually filled with chocolate or coffee flavoured creme patissiere, and transformed it into one of his signature desserts at the Hotel Plaza Athene in Paris. 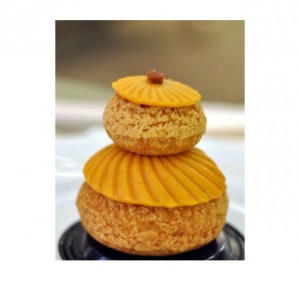
A little research quickly indicates that choux based cakes are another import from Italy. It seems they were introduced to France by Catherine de Medici. While not called ‘choux’ at this time the name evolved as a result of the irregular shape of the little cakes, thought to resemble a cabbage.
The excellent Food and Cooking (McGee 2004) advises that choux pastry dates from medieval times and is characterised by being cooked twice: in the early stage when the paste is prepared and then when it has been formed into whichever final product has been chosen when it is baked or fried. Choux pastries were sufficiently established in 17th century France to be recorded in a French English dictionary of 1611. Petits choux, shortened to tichoux was a street cry of vendors selling small cakes of egg and flour with butter and sometimes cheese. Savoury chouquettes are known as gougères or, if deep fried, as a form of beignet.
Alexandre Dumas (1873) described choux pastry as excellent, comprising a little water, butter and salt to which are added a handful of flour….
It seems that cooks in the nineteenth century were used to such imprecision in their recipes. In the twenty-first century those of us interested in patisserie are told over and over that precision is vital if we are to succeed, we delight in our electronic scales capable of weighing fractions of grams hoping that so armed we will be able to reproduce the pastries we see in the windows of the best patisseries.
For a recipe to survive largely unchanged from medieval times it must have something about it. Choux pastry creates cakes, whatever their final shape, that are hard on the outside with a cavity inside that can be filled with any number of different fillings. No doubt this explains the longevity of the recipe – pastries that can be filled with almost anything and which are easily transported.
Some Science
McGee’s book gives us science as well as some history for the things we bake. He describes choux pastry as a brilliant invention in giving a cook a means to produce a hollow, crisp vessel for other ingredients. This comes about because we cook the flour with the water or milk and butter, tenderising the gluten proteins and preventing them from developing elasticity. As a result ingredients that might otherwise have formed a batter (if beaten together cold) instead form a dough. Eggs bring richness from the yolks and structure building proteins from the whites. Adding egg thins the dough so that air pockets will be able to move and coalesce with the heat of cooking. The butter contributes towards a baked product that resists moisture and stays crisp when holding a cream filling. (p553)
In theory.
Despite choux pastries existing for centuries today’s cookery writers appear unable to agree as to a definitive recipe. Some use milk while others use water instead. Others use water but add powdered milk.
The strength of choux pastries and their ability to keep their form when filled with cream is not perfectly reliable. Like many pastries choux products exposed to air will soften in time. Viewers of both English and French versions of a popular televised baking competition have seen contestants struggle to create a Religieuse à l’Ancienne, a variation of the pièce montée central to many family celebrations.

Religieuse a l’ancien Image from www.mercotte.fr
In France the attempts were so disastrous that no scores were allocated for that task. The incredible Mercotte (France’s answer to Mary Berry) sets out fully detailed instructions for this recipe in her Blog. This picture illustrates what the candidates were attempting to create.
Personally I think I would rather create the more traditional pièce montée based on chouquettes and nougatine than this recipe.
The problem in both competitions was the failure of the filled pastries to maintain their crispness, and so their strength, once filled with cream. Chouquette versions are easier to build because each cake is small and they are generally constructed with caramel to cement the pieces together.
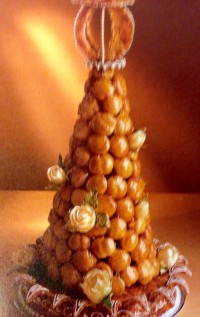 A recipe for a Croquembouche, the traditional choux bun tower, is included in The Roux Brothers on Patisserie written by Albert and Michel Roux in 1986 and one of the best introductions to patisserie we have found. The book is still available via Amazon.
Paris has numerous shops that only sell macarons in many varieties. Pierre Hermé has done particularly well with his macarons although of course he does make other excellent products. Others, having seen the success of single product shops have searched for their ‘macaron’: a simple item, easily varied. Christophe Adam has done this with éclairs. People from all around the world will find time to call at one of his shops during their visit to Paris. Mr Adam now has three shops in Japan where French patisserie is hugely popular. Adam’s eclairs come in all flavours imaginable, he uses both centre and top to hold his various embellishments. Interviewed recently Mr Adam expressed confidence in the longevity of his mono product concept, following in the tradition established decades earlier by chocolatiers. Personally I’m not entirely convinced that an eclair, however beautifully made and garnished, can compete with artisan chocolate.
As with macarons it is easy to produce a basic eclair. Once you have mastered choux pastry it is only imagination that limits the variations possible.
Recipes
Most of the ingredients necessary for our recipes can be found in high street shops. Others are easily found on-line in specialist patisserie suppliers. We are not paid to promote any shop or supplier but in view of the difficulties we have encountered from time to time when sourcing some products we include a list here of suppliers we have found useful.
Baking individual chouquettes, éclairs or any of the other choux based products found in patisseries today is not difficult. There are however numerous variations on the basic choux pastry recipe. My first successful attempt was achieved with the help of a blog called ‘Oh la vache’. Sadly the blog is no longer available but it’s author, Luca Marchiori, has moved from France to Italy from where he has launched a new and equally interesting project: ‘Chestnuts and Truffles‘ detailing the best of Italian cuisine and culture.
The following recipe can be used to make a first small batch of chouquettes. It is an ideal starting point as it introduces the key techniques demanding only a small amount of ingredients.
Chouquettes
50g water
50g milk
2g sugar
44g salted butter
56g plain flour
100g eggs
Candied sugar to decorate
Some notes before getting started

Baking Sheet Prepared for Chouquettes
Method
These small choux pieces have numerous uses. They can carry sweet or savoury fillings, they form the base of profiteroles and, joined together, they can become the base of a cream filled dessert along the lines of a St Honoré.
Here is a recipe for a ganache filling that can transform basic chouquettes. It can also serve as a filling for macarons and eclairs. Much, much more to follow on chocolate.
Ganache
Some notes before getting started:
You will need:
110g milk
25g single cream
235g chocolate (couverture)
45g butter at room temperature
To make the ganache
Assembly
Using a small piping nozzle or the point of a small knife gently pierce a hole to the underside of each chouquette.
If your ganache has been stored in a bowl you will need to transfer it to a piping bag fitted with a nozzle small enough to fit into the holes in the base of the chouquettes.
Gently pipe ganache into each chouquette,
Enjoy!
References:
McGee H (2004) McGee on Food and Cooking, Hodder & Stoughton UK
Roux, Michel & Albert (1986) The Roux Brothers on Patisserie, MacDonald & Co. London
Davidson, A (2006) The Oxford Companion to Food 2nd Edition, Oxford University Press.
Beeton I (1861) The Book of Household Management (released as eBook by Project Gutenberg 2003)
Dumas A (1781 ) Grand Dictionnaire de Cuisine, Paris (available via Google Book Search)
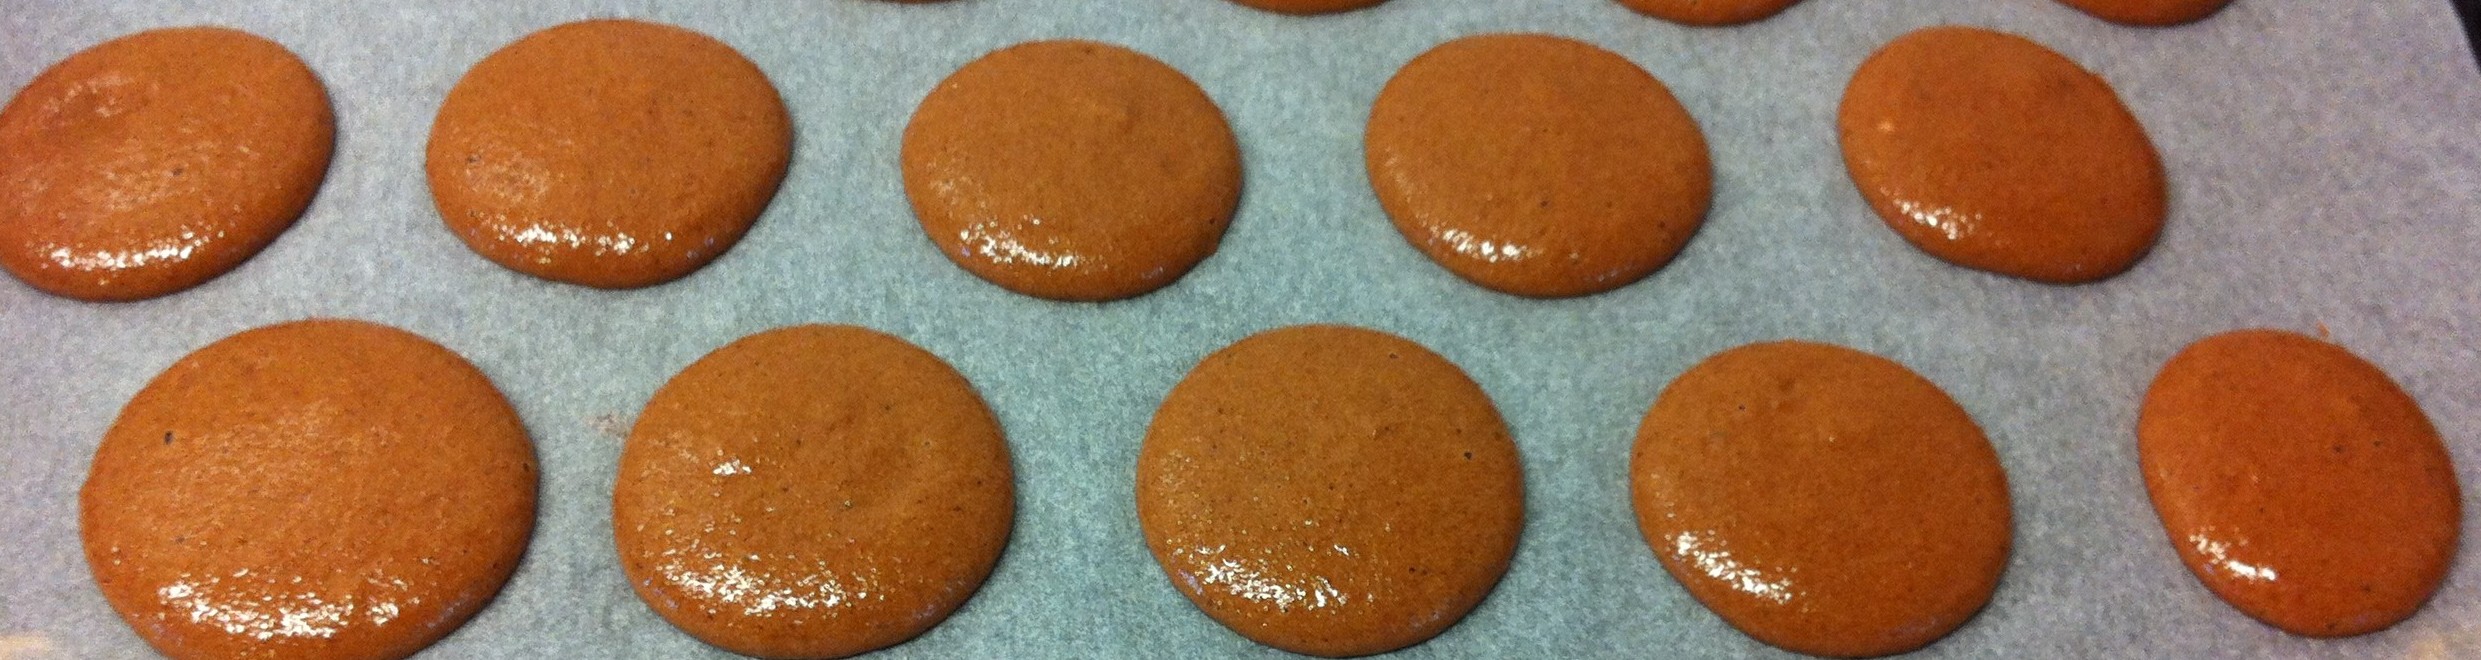
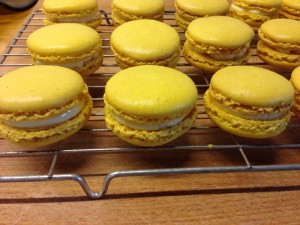
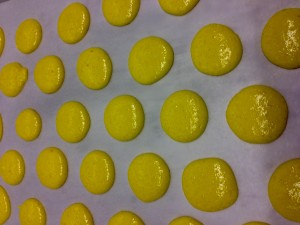
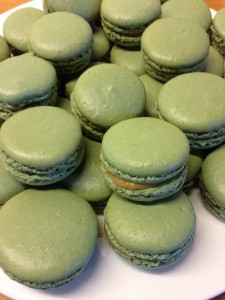 Almost all macarons use the same basic recipe for the two shells that hold whatever filling is chosen. We use the method presented here. Different colourings are used to give the finished product an appearance that best suits the chosen flavour. Here we used a green food colouring in attempt to reflect the apples in the filling.
You will find food colours easily in any supermarket. Many cookery writers insist that powdered colours are by far the best and these can be found easily from on-line patisserie suppliers. You will need to try out the various options available to find which suits you best. Colours are simply incorporated into the macaron mix along with the second part of egg white, mix the colour well into the egg white before adding it to the meringue so that it will blend easily into the final paste. Remember that colours change during cooking. Something that appears vivid in the raw paste will dull down considerably once baked.
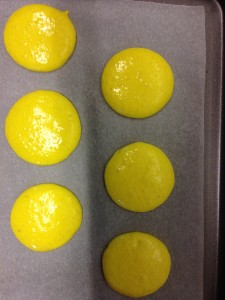
These lemon macarons illustrate the change in colour after baking.
Ingredients
This recipe involves making a caramel, cooking apples and then combining the two to make a filling for macarons. The filling can be made well in advance of the macarons themselves. It stores well in the fridge for several days.
Apples 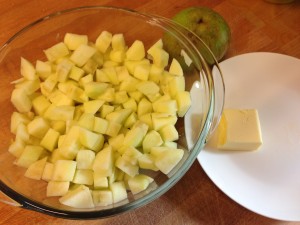
Peel the apples and chop into small cubes
Melt the 25g butter in a heavy bottomed pan large enough for the apples.
Add the cubed apples and stir so that the pieces are coated with butter
Cover and leave the pan over a low heat for around ten minutes.
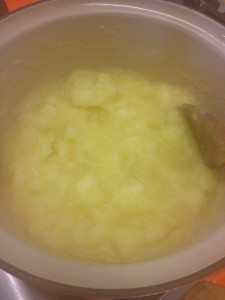 The apples should be starting to fall at the end of the cooking period, you will need to check and adjust your time according to the apples you have and the size of your cubes. Ideally they should form a rough purée but better to over cook than to find very hard pieces when you come to pipe the filling into the macarons.
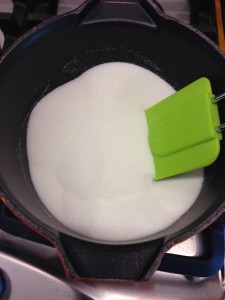
Caramel
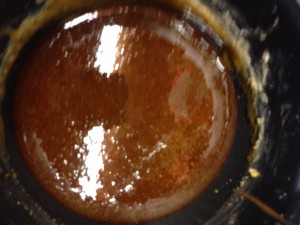
Place the sugar into a heavy bottomed pan and heat until it forms a caramel. Keep a close watch during this process, use a silicon spatula to stir the sugar around so that it melts evenly. Once all the grains are melted lower the heat and keep stirring until you have a light brown coloured caramel.
Keeping the heat very low add the 50g butter and stir until this has melted.
Add the cream (with caution, you are adding a water based ingredient to boiling sugar and the reaction can be dramatic).
Stir until all ingredients are mixed to a smooth caramel.
Allow both caramel and Apple to cool to room temperature.
Once the two components have cooled it is simply a matter of stirring the apple into the caramel so that you have a homogeneous mix. Transfer the resulting mixture to a disposable piping bag, snip off the end so that you have an opening of around 1cm and pipe generously onto your macaron shells.

If you have chosen to have larger pieces of apple rather than a smooth purée you might need to cut the piping bag a little higher so that the apple pieces can pass through.
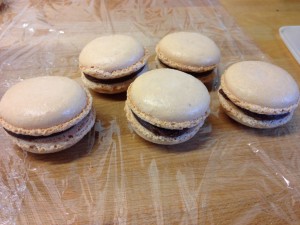
Complete the macarons by adding a second shell to the top. Store in the refrigerator, remove 30 minutes before eating so that the macarons are near to room temperature.
The finished toffee apple mix can be stored either in a piping bag or a sealed container in the refrigerator for at least a week. Similarly the macarons can be stored for some days in the refrigerator, in fact they will improve if left 48 hours before eating.
This toffee apple paste can be used in numerous recipes in addition to macarons. We have used it to fill éclairs, as a base layer underneath fanned apples for an apple tart and as a centre for moulded chocolates. It would also be fine as a filling for sweet pancakes or with waffles. A really versatile way to put windfall apples to good use.
Recipe (for one serving)
No special method required – just put the ingredients in a shaker, shake and serve
Background
I was wanting to devise a cocktail that could use the chilli heat and flavour from the 250 Scoville Naga chilli vodka and having a deep affection for chilli chocolate decided that the combination could prove interesting. As a base spirit, I decided that tequila could be interesting and it fits in with the Mexican theme – hence the name – Aztec. It is a rich, glorious flavour, suitable particularly as a winter aperitif but try it and see what you think.
Notes
The chilli heat is there but not overpowering and it really brings out the flavour of the Mozart chocolate liqueur.
It is appropriate that the first recipe for this new blog should focus on making macarons. Baking has been something that I have enjoyed for many years but a fascination for French patisserie became a passion to learn how to create some of the classics, and not so classics, after attending a short course on making macarons at Patisserie Guillemard in La Flèche, a small town close to Le Mans in France in August 2012.
Curious about the history as well? – read on!
What is a macaron?
There are many possible answers to this question. In England during my childhood we enjoyed the occasional coconut macaroon, simple cakes that a child might learn to make. Recipes for these cakes are numerous, including one from Mrs Beeton in 1861. Mrs Beeton’s Book of Household Management of that year included recipes that she had collected from various sources so no doubt there are earlier versions available.
In France recipes for small cakes based on ground almonds are recorded from the 1550s. In 1873 Alexandre Dumas published ‘Le Grand Dictionnaire de Cuisine’ including two recipes for macarons based on ground almonds. Neither indicates any cream filling and Dumas makes no mention of colour use, garish or not.
Historians appear to agree that the origin of the word ‘macaron’ is found in Italy. Royal houses in Europe during the 16th 17th and 18th centuries saw marriages between Italian, Austrian, German French and Spanish families and along with the political treaties that often underpinned these arrangements came an exchange of cultures. Almonds were known of in Italian cooking from the second half of the 15th century. Catherine de Medici is said to have brought almond paste to France on her marriage to the Duc d’Orleans in 1533.
To really learn about the early versions of macarons in France why not visit Musee de l’Amande et du Macaron at Montmorillon in the Vienne region. If you know of a similar repository of almond based pastries in the UK please let us know so that we can add their details.
History tells us that the simple, unadorned macaron remained a royal favourite in France through to the revolution in 1789.
1830 was a notable year in French history. In July revolutionaries were again active and Louis-Phillipe, Duke of Orleans began his 18 year reign little expecting to end his days exiled to England. In that same year someone had the idea of sandwiching two almond macarons together, using jam as the filling. While still some way from the smooth cream filled biscuits we know today as French macarons the idea clearly took off, by the end of the century Pierre Desfontaines, grandson of Parisian pattisiere Louis Ernest Ladurée, began commercial production of macarons filled with ganache.
Ladurée is of course one of the best known addresses in Paris for patisserie. It is claimed that the recipe in use today is unchanged from that introduced at the start of the 20th century.
Macarons, or macaroons were apparently often served as light refreshment in 18th and 19th century Britain. Alan Davidson, in his excellent Oxford Companion to Food, advises that they were also used in cookery to provide texture and flavour in desserts and cakes. It seems that in the UK we were perhaps more adventurous than the French in terms of adapting a basic recipe in different ways. Davidson cites a cookery book of 1827 listing eight different recipes for flavoured macaroons including chocolate, vanilla and cinnamon.
Leaping forwards the early 21st century has seen macarons featured in popular films and television programmes. Pierre Hermé in Paris opened stores selling only macarons in their 21st century guise. He has successfully marketed both sweet and savoury versions and his best selling book, simply called ‘Macarons‘, includes recipes involving lemon and avocado, foie gras and chocolate or black truffles.
A quick search on the world wide web will bring you to any number of articles expressing concern that macarons are becoming so ubiquitous that their qualities are threatened. Starbucks apparently sell them and the Wall Street Journal wrote in 2010 that McDonalds were serving them at around half the price of a Parisian equivalent.
The Recipe?
Clearly the sandwich style macarons that have generated controversy in recent years involve stages in addition to recipes of the 19th century regardless of the number of ‘o’s in the title.
Mrs Beeton’s macaroon recipe isn’t too far away from that used today to create the outer biscuits of the modern macaron. Ingredients are simply sweet almonds, sugar, egg whites and wafer paper. No ground almond in those days, the first task was to blanch, skin and dry the almonds before pounding them well with a little orange flower water (usefully omitted from the list of ingredients).
Having beaten the egg whites to a ‘stiff froth’ these and the sugar are added to the almonds and the ingredients blended together. When the paste becomes soft we are advised to use a ‘biscuit syringe’ to set out the biscuits onto wafer paper at equal distances. To ensure an attractive result we can add a line of almonds to the top of each biscuit and strew some sugar over the top before baking in a slow oven until light brown in colour.
Mrs Beeton concedes that these simple biscuits require quite some work, advising that it is almost as economical to purchase them at a good confectioners.
Twelve years later in France Dumas advises that four egg whites are used with 500g almonds and the same quantity of sugar or, for a sweeter version, 1kg sugar to 500g almonds. If the mix is too dry more egg white can be used. Small portions of the mix are spread on baking paper (no indication as to what type of paper was appropriate in 1873) and baked in a well closed gentle oven.
Modern Variations
All recipes for the modern variant on a macaron involve sugar, almonds and egg white. There are broadly two schools of thought in respect of the approach to take: French meringue or Italian meringue. The former is perhaps simpler, requiring nothing more than a means to whisk the egg whites. Italian meringue turns part of the sugar to a syrup and so requires a means of heat and a thermometer.
At Patisserie Guillemard we used French meringue as the base for our macarons. This was my first attempt at making macarons and for some time after attending the course I made every effort to succeed using the method taught. The results weren’t bad, the flavour was fine but I couldn’t achieve a consistent finish. Further research brought me to Pierre Hermé’s ‘Macarons’ and the Italian meringue method.
Now things were better, predictable to the extent that I could produce macarons that I was happy to share with people. From time to time the results would be less perfect than I had hoped and I continued my research in attempt to gather as much information as I could in order to improve and achieve respectable and repeatable results.
The method I use is still basically that of Pierre Hermé. Recently though I have changed the way in which I mix the dry ingredients into the meringue. If you look on You Tube you will find hundreds of videos insisting that the art of ‘macaronage’ can only be achieved in specific circumstances: a dry room at 47.5 degrees, wind in a certain direction, two ducks walking wing in wing down the street…. Search long enough and I’m sure you will find advice at least as ludicrous.
Meanwhile French television created its own version of Great British Bake Off. Mary Berry is replaced by Mercotte, aka Jacqueline Mercorelli, a food writer and blogger in her 70s. Mercotte has an extensive blog full of recipes and where macarons are an important feature. Her books on macarons are published in English but the blog is all French. In amongst a wealth of information are some very useful hints that can make all the difference.
Mercotte also appears in several You Tube videos. In one of these I was surprised to find Mercotte advocating use of a food mixer to achieve all of the stages of preparing a macaron batter. While the Expert asserts that only a Kitchen Aid mixer will allow you to achieve good results I can assure any one interested that a ‘vintage’ Kenwood Chef is just as reliable. This has been my preferred method for some short while now and it is on that basis that I offer the recipe below.
This recipe is a basic macaron mix. Save for any colouring, the recipe is identical for all classic Parisian macarons. This interpretation is based on Pierre Hermé’s recipe with minor adaptations to ingredients and method taken from the excellent ‘C’est ma Fournée‘ blog and Mercotte.
The mix should give you around 35 complete macarons.
You will find a recipe for chocolate ganache here (to follow soon)
Ingredients
Equipment (in addition to the obvious bowls, spatulas etc)
ESSENTIAL
DESIRABLE
Preliminary Steps
Weigh out all of the ingredients so that everything is to hand when you get started.
Prepare a piping bag ready for the macaron mixture
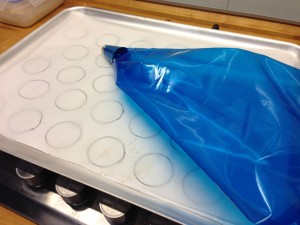
Prepare baking sheets by covering with baking parchment.
If you are not an expert with a piping bag, prepare a template to slide under the baking parchment, this should have rows of circles 3cm wide, spaced 2cm apart to allow the shells to spread without sticking together. This won’t come into contact with the mix and so can be stored and used again.
If using a template place this under the baking parchment
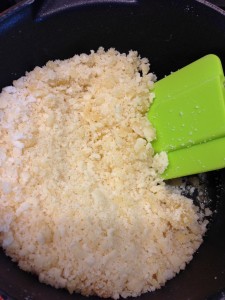
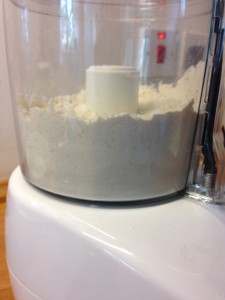
1. Place ground almonds and icing sugar into the bowl of a food processor fitted with the knife blade. Process until the two powders are well mixed. This avoids the need to sieve ground almonds and creates a ‘want pour tant’, an equal mix of the two ingredients.
2. Place water and caster sugar in a small pan, heat to form syrup and continue cooking until the syrup reaches 118°c
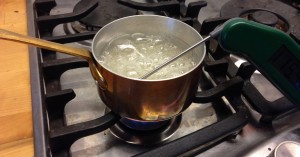
3. When the syrup reaches 110°c begin whisking one of the portions of egg white in a stand mixer. You can of course do this by hand but any type of mixer will make the task much easier. We have a small Dualit hand mixer that performs tasks such as this with ease. As the egg whites begin to stiffen add the 15g caster sugar in three portions. Whisk until egg whites form stiff peaks.
4. With the mixer at a medium speed pour the syrup onto the egg whites and mix until it is incorporated. The egg whites should regain stiff peaks.
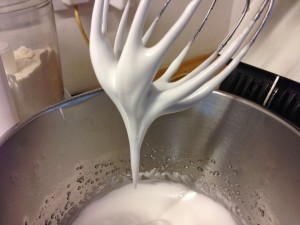
Remove the whisk from the stand mixer and insert the flat (K) beater. If you have used a hand mixer or whisk to this stage, use a silicone spatula for step 5. Most recipes advise use of a spatula at this point, it was only after finding Mercotte’s version that I began using a stand mixer throughout. The task can be achieved just as easily by hand.
5. Tip the remaining egg whites and the tant pour tant into the mixer and beat until the powders are incorporated into the egg whites. This should take less than a minute. Either continue beating with the mixer until the texture of the mix forms a ‘ribbon’ when dropped from a spatula, or complete this stage by hand with a spatula. Again, if completed in the mixer this stage takes only a few seconds.
A huge amount has been written about finalising the macaron paste and you will find any number of videos on You Tube showing the consistency to aim for. The more the paste is mixed the thinner it will become because air will be knocked out of the meringue that holds the paste together. A mix that is too stiff will be difficult to pipe into smooth discs. It really is a question of trial and error, certainly it is easier to work with a slightly thicker paste and for a first attempt it is probably best to go in this direction.
Watch this space for photographs showing the consistency of the mix I use….
6. Transfer the mixture to the piping bag, use a spatula or similar to force all of the mixture towards the tip of the piping bag so that you can twist the top and manage the paste as you pipe the discs.
7. With the tip of the piping bag almost touching the baking parchment pipe out macaron halves to form 3cm discs. This task really is made much easier if you have a template beneath your sheet of baking parchment.
Keep the bag upright and resist any temptation to lift the tip away from the paper or to form a swirl or similar to finish each disk. Simply pull the bag away when the disk is large enough. The aim is to achieve a flat surface and this is only made more difficult if the bag is too high when the mixture is piped or if you attempt to add an artistic swirl!
Any small peaks should settle by themselves as the macarons will stand for 15 minutes before baking. Larger bumps can be flattened with a damp finger or pastry brush but if you pipe the shells as described you shouldn’t need to spend time attempting to squash peaks down.
As with many things it can take a while to achieve the desired results. Remember that whatever their appearance your macarons will be edible and it is all but certain that you, your family and friends will enjoy every tray that you bake.
This tray was made using a mix that was relatively liquid, while there are no ‘points’ on the top of the discs there are quite a few ‘mishaps’… The garish yellow colour tones down considerably when cooked.
8. Leave the trays of macarons to dry at room temperature for around 15 minutes. After that time if you gently touch the top of one you should feel that a very slight crust has formed.
During this time pre-heat the oven to 160°c.
All ovens are different. Experimentation has shown that if I bake my macarons at 160°c for 15 minutes they are just right. Your oven might be faster or slower and the only way to find the right temperature is to try it out. Mercotte asserts that it is impossible to make macarons in a gas oven. I haven’t tried but given that she also says that it is impossible to make macarons with any mixer other than a Kitchen Aid and I have found my 40 odd year old Kenwood Chef more than appropriate I wouldn’t take her word on ovens too seriously.
9. Bake each tray of macarons for 15 minutes. If your oven has a glass door you should be able to watch as each little disk gradually forms a little collar at its base while the top remains smooth. Once out of the oven slide the parchment off the hot tray and leave the macarons to cool a little. After about ten minutes they should lift easily from the parchment.
Attempting to lift the macarons from the parchment while they are still warm is a mistake often made. It really is better to wait until they are quite cool when they will detach much more easily. If you really can’t wait you might find that a spatula helps move macarons that are still warm.
If you have followed this recipe you should have approximately 70 single macaron biscuits. Fillings can be as simple or sophisticated as you wish. Chocolate is always popular, pistachio and bitter almond also go well with the sweetness of the macaron shells. We will publish various filling recipes as we go along, for now you might enjoy this toffee apple variety.
Macarons store well in a sealed box kept in the refrigerator. You can store them filled or as they are.
Eggs
Much has been written about egg whites suitable for macarons. Some experts would have you stand the egg whites at room temperature for days in order to evaporate water content, others state that the older the egg whites the better.
Frankly I have used fresh, less fresh and extremely unfresh egg whites for macarons and have found no difference in the results. I would advise that the egg whites, in fact all ingredients, should be at room temperature when used.
Many supermarkets now sell pasteurised free range egg whites in tetra packs. These are fine for macaron making if you won’t have a use for egg yolks.
Baking Parchment
Perhaps you have seen silicone mats marked out for macaron baking and think that these will be better than simple parchment. Experience has taught me that while silicone can be very useful in the kitchen, it can also cause problems. This is especially the case when baking and we will write more on the topic, and the reasons to think carefully before spending large amounts of money on pretty accessories that don’t perform as hoped.
To achieve well baked macarons with regular collars simple baking parchment is much the best option in my experience.
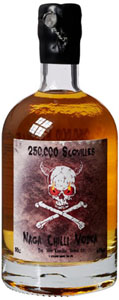
As Master of Malt say about this vodka:
“We have created a monster, summoned from the very bowels of hell, formed in a vile carboy filled with a horrid mound of Naga Jolokia chillies (the world’s hottest chillies), steeped in grain vodka. We’ve packaged it in a handsome, heavy glass bottle with industrial-grade sealing wire and lead security seal (with a skull and crossbones embossed on it). To get to this bottle, you’ll literally have to open it with wire cutters, but we strongly recommend you don’t. In fact, this unspeakable 250,000 Scovilles vodka is a chilli vodka so horrendous we suggest you don’t even purchase it. Please just shut down your computer and have a nice cup of tea instead. Try to forget what you saw.”
Not a particularly inviting description, I think you’ll agree but don’t be put off by what has become for us a very versatile ingredient indeed! Yes it is ludicrously hot and I certainly wouldn’t recommend drinking it neat but handle it with care and its consistent hot chilli flavour can be used in many diverse applications.
0.5 ml in a cocktail can add a good chilli flavour and heat. A similar amount in a pizza or pasta sauce will do likewise. Used in these quantities, it becomes a very cost effective way of adding chilli heat to almost any dish and its consistent chilli heat means that it is entirely predictable in how much fire it adds. An excellent alternative to fresh chillies which can often vary wildly in their potency.
(The 250,000 Scovilles refers to the “hotness” as defined by the Scoville scale of chilli heat. As a contrast, a jalapeno pepper scores 1000 – 4000 Scoville units)
References:
Making good quality pizzas at home has long been an ambition of ours. The mechanics of assembling a good pizza are pretty straightforward (see the pizza section of this blog) but the stumbling block has always been how to cook it to give a good base and evenly cooked topping. There are actually three main requirements.
Like cooking a steak, part of the secret is to cook it quickly. Professional pizzeria use an oven capable of producing a temperature of around 400C (compare to a domestic oven which can maybe manage 270C). quick cooking helps ensure that the base is crisp on the outside with some softness inside, rather than becoming more like a biscuit when cooked more slowly.
Another issue is to provide a heated surface to allow rapid transfer of the heat into the base of the pizza. we tried using quarter inch thick steel plate which I preheated in the oven and this went some way towards a good result but unfortunately did not satisfy the third requirement to cook a good pizza – giving a path for moisture in the base to escape.
For this reason, many people use a pizza stone in their domestic oven in place of our steel plate. The porous surface of the pizza stone goes a long way to promoting the crispness of the bottom of the base.
As you can see, there is no ideal solution using a standard domestic oven. After many years of trying (and producing some fairly decent pizzas!) we still could not produce a pizza that could compare favourably with one from a pizza restaurant – the cooking always let them down.
Enter the G3 Ferrari!
This little oven goes a very long way to addressing the problems above. Firstly, it can produce a temperature of 390C – this ensures that the pizza is cooked quickly. The cooking surface is a proper stone which is heated from below by an embedded electrical element and from above to ensure that the toppings cook appropriately.
Not to be underestimated is the cunning two piece peel that comes with it. It serves two functions – as a handy guide to the required pizza size (if it fits on the peel it will fit on the stone) and a very simple way of transporting the pizza to the stone – the fact that it is in two pieces makes it very easy to centre the pizza by jiggling each half as required.
Things to watch out for
Before putting the rolled dough on the peel, ensure that the surface is well dusted (We use semolina to give a bit more crunch to the base). After removing the pizza, do not close the lid without dusting off any excess flour / semolina from the stone if the top element is still hot as it can tend to catch fire!
When cooking, turn the pizza occasionally with a stiff spatula to ensure that the base doesn’t stick (this is more important if you are using shop bought pizza rather than home-made). This also helps ensure that the topping cooks evenly. On the subject of shop bought pizzas, they cook brilliantly provided that they are properly defrosted first. Be aware that these shop bought pizzas will cook in around 3 or 4 minutes, rather than the 10-12 minutes in a conventional oven!
Verdict
An excellent piece of kit and well worth the money (around £100). Once you’ve cooked a pizza with this device, you’ll never want a takeaway again! On that basis, you can recoup the cost in no time.